Thursday, March 3, 2016

Portrait Lighting

REMBRANDT LIGHTING

Rembrandt lighting is an excellent way to create portraits that feel natural and can help to tell the story of an individual by giving them character. I love making sure that there is always a catch light in the eyes. I have always loved the saying, that the eyes are the window to the soul! I believe that having a catch light in the eye shows this.


GLAMOUR LIGHTING
Glamour lighting can help create absolutely stunning photographs. When I think of glamour lighting I think back to the classic black and whites. Images of Marilyn Monroe, Grace Kelly, and Ginger Rogers. This type of lighting is the perfect way to hide imperfections. In my mind it helps to create a somewhat dreamy atmosphere. I love using glamour lighting, clients love this look.


HIGH KEY/LOW KEY LIGHTING


OUTDOOR 3 POINT LIGHTING


 EDITING OTHERS TAKES!

At first I was hesitant in doing this, but I realized how beneficial this could be for others. Well, not only for others! I realized that if I were a photojournalist, basically I would be taking the photographs and giving them to editors to choose and edit as they please. I also realized that my way of editing may not be what others prefer. We all see things differently and may interpret it in a whole different "Light" than others! I chose from a variety of others takes and applied what I thought was most pleasing to the photograph. Editing...first I either changed the images to black and white, or left them in color. Second, I added a little contrast if needed. Third, increased the exposure if needed. Last, sharpened the photos for print. When editing my own photos I try not to change or edit the images too much. When shooting images I try to frame them exactly how I want them. I typically follow the above steps when editing my own. I try to keep it simple!

Photo Credit: Nicole Winona
Photo Credit: Joshua Kaneversky
Photo Credit: Andrew Pinckney
Photo Credit: Jamal Smith
Photo Credit: Andrew Pinckney

Sunday, February 7, 2016

Baseball "Bracketing"

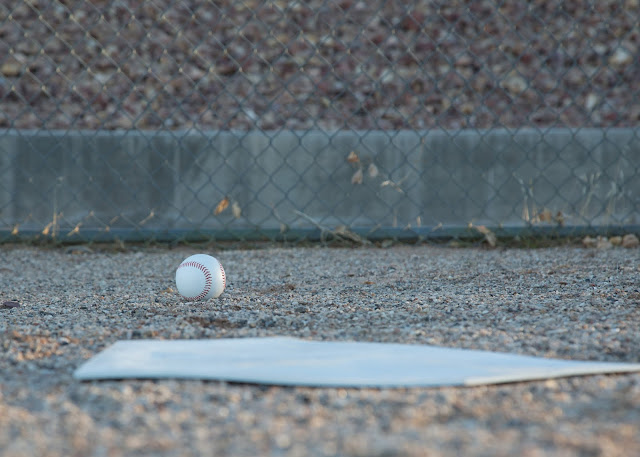
The following images are bracketed images with a fixed shutter speed at 1/100, an ISO 200, and fully manual. This was a great assignment. I don't typically stop down, or open up my aperture more than one stop when shooting. So this exercise shows how with each stop you are either loosing highlights or shadows. It also shows how the different apertures effect depth of field.
ISO 200  f16  1/100
ISO 200  f11  1/100
ISO 200  f8  1/100
ISO 200  f5.6  1/100 
ISO 200  f4  1/100
The following five bracketed images are shot at ISO 200, on AV Mode (Aperture Priority). By using AV Mode it enabled me to adjust my aperture to the appropriate f-stops that were required, and the camera adjusts the shutter to compensate to create a properly exposed photograph. This is also a great example of Depth-of-Field.
ISO 200  f16  1/20
ISO 200  f11  1/40
ISO 200  f8  1/80
ISO 200  f5.6  1/160
ISO 200  f4.0  1/320

Wednesday, February 3, 2016

Little Superheroes

Shooting "Tight" Photo Essay

Going into this photo essay my expectations were a little bit different than shooting "wide". I knew that it was going to be challenging, and more difficult. After the first assignment I knew that I needed to make a storyboard, and know the exact images I wanted. This was especially true because of the focal length I would be using. I used my Canon 5D Mark III 70-200mm lens. Several times while shooting I was tempted to zoom out. Instead of zooming out, I would have to move back. Although, I went into this assignment knowing the challenges I faced, my perception was a lot different. Not only were my perceptions of shooting "tight" not what I expected. It was difficult being so far back from them, and trying to explain what I wanted them to do. One thing that I really love is the close-up detail shots, and the depth-of-field that it creates by shooting "tight".

For my shooting "tight" photo essay I asked these two little superheroes if I could take photographs of them while they saved the day. They were so excited to do this for me, and I had a great time taking them. When I was going through the images I had taken, I couldn't help but add my own dialogue to them. For the most part, they are not posed. I told them they were superheroes, and just let them have fun while I followed them around and photographed them.

F4 1/400 ISO:400 200mm
F4 1/250                                                                                         F4 1/320
F4 1/320
F4 1/320                                                                                    F4 1/400
F4 1/400
F4 1/250
F4 1/250

Saturday, January 30, 2016

DSU Student Housing

Shooting "Wide" Photo Essay

Not that long ago, Dixie College was known just a community college located in Southern Utah. Today, the once quaint Community College has morphed into a University. Although the institution has achieved the status of University, the transformation from College to University can be seen. It started with the construction of the Holland Building, then came the renovation of the Library and the construction of the Clock Tower.  

Now the metamorphosis can be seen in the student housing units. While the housing units that served the college for many years can still be seen, they are giving way to a much grander design.  Although a fence and danger signs prevent a close up inspection of the new student housing facility, the majesty of the crane is a clear indication that something grand is on the horizon for students attending Dixie State University. 

These images were all shot using a Canon 5D Mark III at 24mm. When it came to my perceptions of how I was going to photograph this project, I was a little surprised when it came down to actually photographing it. Shooting “wide” and having those restrictions was a little new to me. Although I have been a photographer for several years, I have never shot in this capacity. When photographing something, or someone I have always zoomed in or out to achieve the image I was looking for. Shooting “wide” allowed for great overview shots of the scene. But, in order to tell a story through photographs you need to move in and get detail shots. Even by getting closer to this construction site I was limited on the shots I was able to actually get. It was more difficult to telling the story than I thought.

F16 1/250
F11 1/160
F11 1/160
F11 1/160
F11 1/160
F4 1/2500
F8 1/1600
F8 1/1000
F8 1/1000
F8 1/800
F16 1/160